

What is Ansible?
Ansible is a powerful open-source automation tool used for configuring, managing, and deploying software applications and IT infrastructure. It falls under the category of Configuration Management and Infrastructure as Code (IaC) tools. Ansible enables IT teams to automate repetitive tasks, streamline processes, and ensure consistency across their systems, regardless of their size or complexity.
Why We Need Ansible:
Efficiency: Ansible automates manual, repetitive tasks, saving time and effort for IT personnel. This efficiency allows teams to focus on more strategic and high-value activities.
Consistency: With Ansible, configurations are defined as code, ensuring consistency across environments. This reduces the risk of errors caused by manual interventions and promotes standardization.
Scalability: Ansible scales easily to manage complex infrastructures comprising thousands of servers and devices. Its agentless architecture and parallel execution capabilities make it well-suited for large-scale deployments.
Flexibility: Ansible supports a wide range of use cases, including configuration management, application deployment, cloud provisioning, and orchestration. Its versatility makes it a valuable tool for various IT operations.
Cost-effectiveness: By automating tasks with Ansible, organizations can reduce operational costs associated with manual labor, minimize downtime, and optimize resource utilization.
Auditability: Ansible playbooks, which define automation tasks, are human-readable and version-controlled. This facilitates auditing, troubleshooting, and collaboration among team members.
Integration: Ansible integrates seamlessly with existing infrastructure components, including cloud platforms, network devices, databases, and monitoring systems. It supports a vast ecosystem of modules and plugins for extending functionality.
Real-Time Example for Non-IT Personnel:
Imagine you're managing a large bookstore chain, overseeing operations across multiple locations. You face challenges in ensuring consistent inventory management, updating prices, and promoting special offers across all stores. Here's how Ansible can address these challenges:
1. Inventory Management: You can use Ansible to automate inventory updates across your stores. By defining inventory items and quantities in Ansible playbooks, you can synchronize inventory data in real-time, ensuring that each store reflects accurate stock levels.
2. Price Updates: Ansible enables you to automate price adjustments for products based on predefined rules or promotions. By defining price changes in Ansible playbooks, you can deploy these updates simultaneously to all store systems, ensuring consistency in pricing.
3. Special Offers: Suppose you want to run a promotion offering discounts on select books for a limited period. With Ansible, you can create playbooks to update product attributes, such as promotional pricing and display banners, across all stores' websites and POS (Point of Sale) systems.
4. Infrastructure Management: Beyond retail operations, Ansible can automate tasks related to infrastructure management, such as configuring Wi-Fi networks, updating digital signage, and monitoring security cameras. By defining infrastructure configurations in Ansible playbooks, you can ensure consistency and reliability across all store locations.
5. Disaster Recovery: Ansible can also help streamline disaster recovery processes. By defining backup and restoration procedures in playbooks, you can automate data backup tasks and swiftly restore systems in the event of hardware failures or data breaches.
Ad-hoc commands:
Ad-hoc commands in Ansible are useful for performing quick tasks or executing one-off commands on remote systems without the need for writing a playbook. They provide a way to interact with remote systems in a more immediate and direct manner. Here are some reasons why ad-hoc commands in Ansible are valuable:
Quick Tasks: Ad-hoc commands allow you to perform quick tasks or run commands on multiple hosts without the need to write a full playbook. This can be handy for tasks that don't require complex orchestration.
Immediate Actions: If you need to perform an action immediately on one or more remote systems, ad-hoc commands provide a fast and straightforward way to do so.
Debugging and Troubleshooting: Ad-hoc commands can be useful for debugging and troubleshooting purposes. You can quickly check the status of services, inspect system information, or gather diagnostic data from remote systems.
On-Demand Management: Ad-hoc commands are useful for on-demand management tasks such as installing packages, restarting services, modifying configuration files, or checking system health.
Flexibility and Exploration: They offer flexibility and allow you to explore Ansible's capabilities without the overhead of writing and managing playbooks. You can experiment with different modules and parameters to understand how they work.
Testing: Ad-hoc commands can be used for testing purposes, such as verifying connectivity to hosts, checking if required software is installed, or validating configurations.
Emergency Response: In situations where there's an urgent need to perform actions on remote systems, ad-hoc commands provide a quick way to address the issue without the delay of creating and executing a playbook.
While ad-hoc commands provide immediate benefits and convenience, it's essential to note that they are not suitable for managing complex or repetitive tasks in the long term. Playbooks offer a more structured approach for configuration management, automation, and repeatability. Ad-hoc commands are typically used for tasks that are ad-hoc in nature or for quick actions that don't warrant the creation of a playbook.
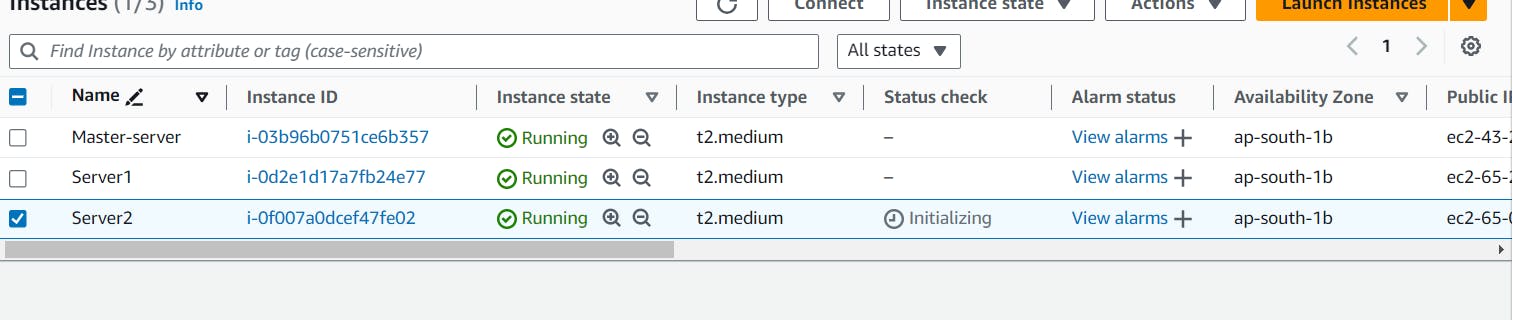
Setup 2 more EC2 instances with same Private keys as the previous instance (Server)
We need 3 machine, Fist is master-server and second and third is server1 and server2
So ho to create ec2 machine:
To create three EC2 instances with the same PEM key, the same Ubuntu AMI, and specific security groups, you can use the AWS CLI (Command Line Interface) or the AWS Management Console. Below, I'll provide step-by-step instructions using the AWS Management Console:
Step 1: Launch EC2 Instances
Login to AWS Console: Log in to your AWS Management Console.
Launch Instances:
Go to the EC2 dashboard.
Click on "Launch Instance".
Choose the Ubuntu AMI.
Select the desired instance type (e.g., t2.medium).
Click "Next: Configure Instance Details".
Configure Instance Details:
Set the number of instances to 3.
Specify the subnet, network settings, and other details as needed.
Optionally, you can assign names to your instances here (e.g., master-server, server1, server2).
Click "Next: Add Storage".
Add Storage: You can keep the default settings or adjust as needed. Click "Next: Add Tags".
Add Tags: Optionally, add tags for easier identification of instances. Click "Next: Configure Security Group".
Configure Security Group:
Create a new security group.
Allow SSH (port 22), HTTP (port 80), and HTTPS (port 443) inbound rules.
Ensure the source allows connections from anywhere (0.0.0.0/0 for IPv4 and ::/0 for IPv6).
Review and click "Review and Launch".
Review and Launch:
Review your instance configurations.
Click "Launch".
Select Existing Key Pair:
Choose an existing key pair or create a new one. This PEM key will be used to SSH into all three instances.
Launch Instances:
Acknowledge and click "Launch Instances".
Access Instances via SSH:
Once the instances are launched, you can SSH into each instance using the public IP or public DNS and the PEM key you selected.
Install Necessary Software:
After SSH into each instance, you can install any necessary software and configure them according to your requirements.
By following these steps, you will have three EC2 instances named master-server, server1, and server2, all using the same PEM key, Ubuntu AMI, and security group settings. They will also be accessible via SSH, HTTP, and HTTPS protocols.
Copy the private key to master server where Ansible is setup
First, We need to connect the master server and install ansible in master server.
sudo apt-add-repository ppa:ansible/ansible
sudo apt update
sudo apt install ansible

Now need to add pem key which is available in your local machine so nee to add ubuntu machine.
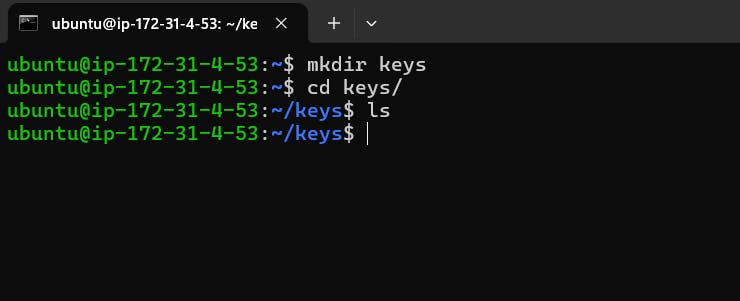
first we need to create a directory that is keys in this directory need to add pem key.
Now , copy to ssh client in your ec2 machine that is.
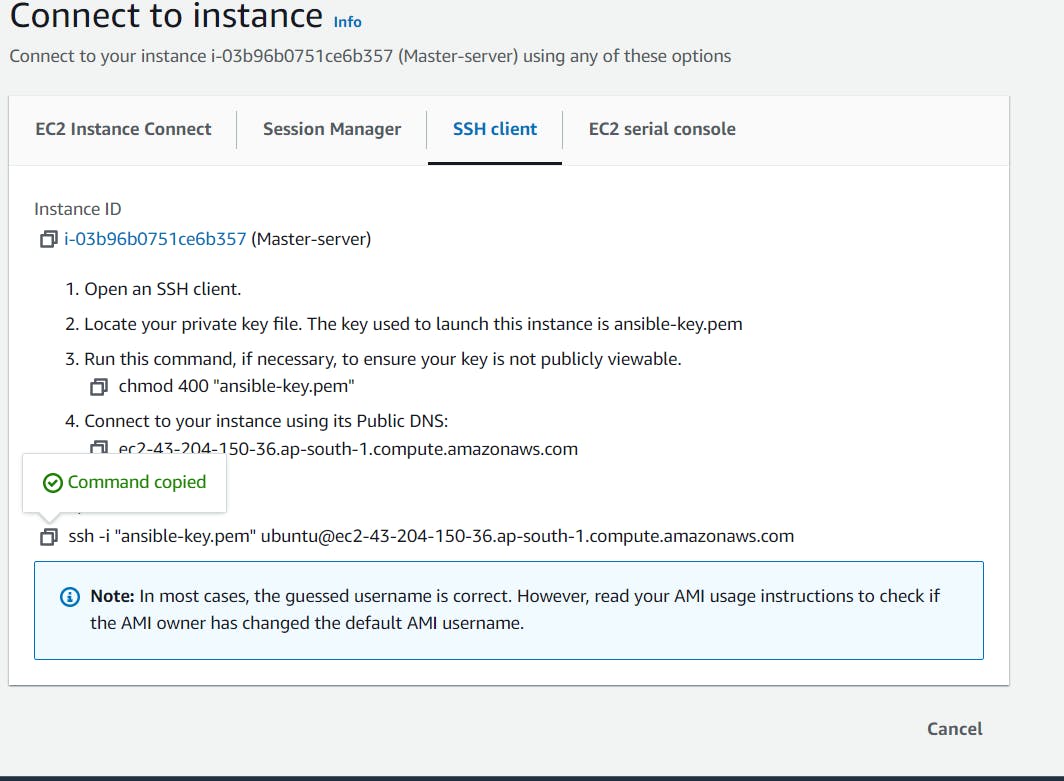
And need to go window powershell and type ssh commands for some changes that is ssh to scp and include key, also provide the key directory file.
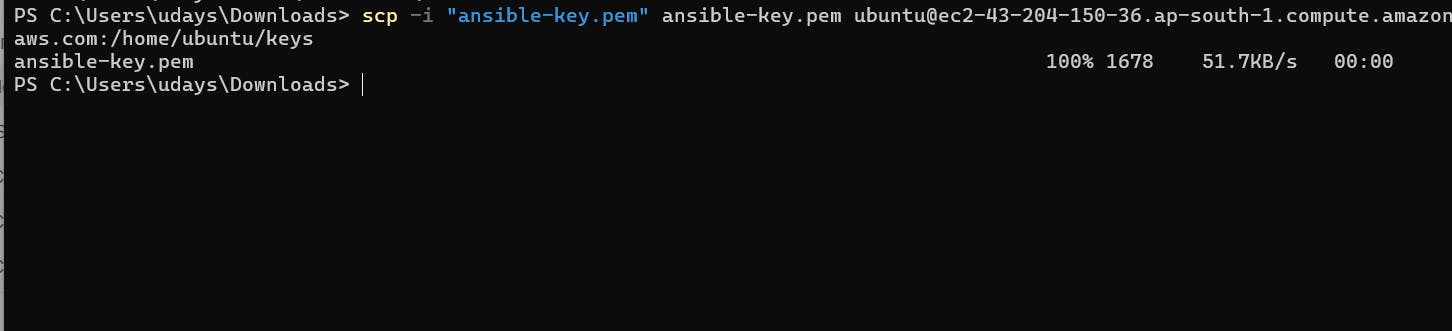
scp -i "ansible-key.pem" ansible-key.pem ubuntu@ec2-43-204-150-36.ap-south-1.compute.amazonaws.com:/home/ubuntu/keys
Now go master server and go to directory and check file is here or not, you can see file is here.

Now need to go ansible and you can see we have two files and one directory.

If you need to connect master server to server1 and server2 need to change master-server ansible hosts files. In this hosts file you need to add public ip both ther server that is server1 and server2 and provide the path also.
open your master-server hosts file the command is.
sudo vi hosts
First need to add public ip for server1 and server2 in master-server.
server1 ansible_host=<public ip server1>
server2 ansible_host=<public ip server1>
Now need to add private key path.
ansible_python_interpreter=/usr/bin/python3
ansible_user=ubuntu
ansible_ssh_private_key_file=<path where you key>

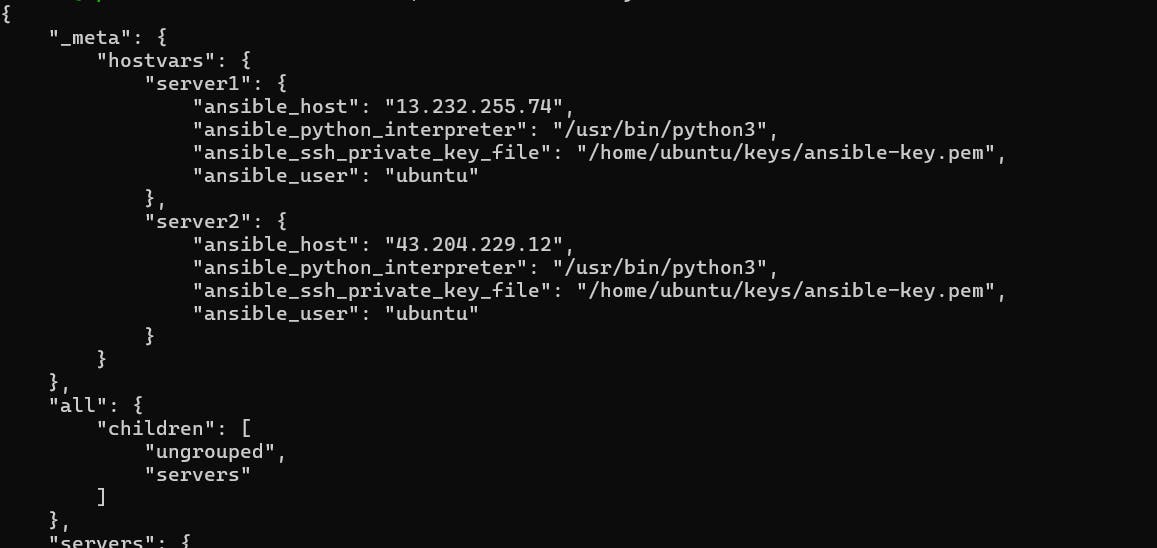
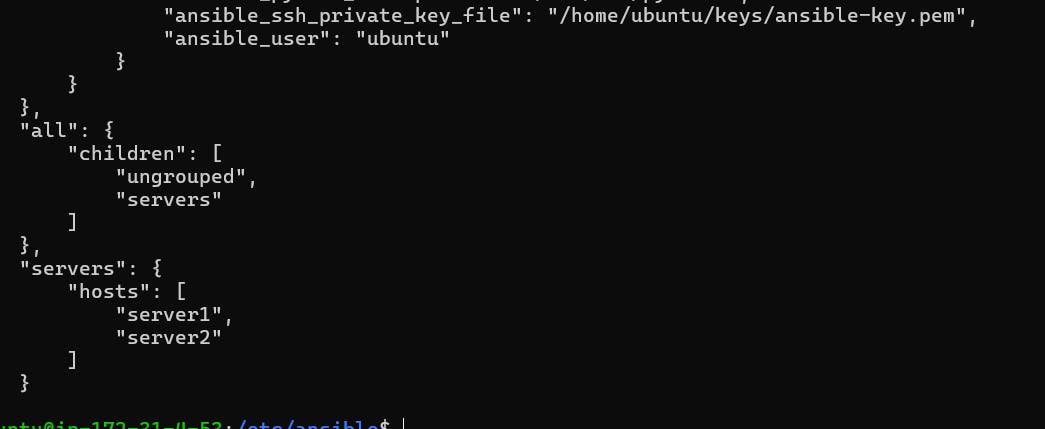
Now to check type this command
ansible-inventory --list
Now go the the keys directory and change the permission
chmod 600 /home/ubuntu/keys/ansible-key.pem

Now need to ing ther servers that is server1 and server2
ansible -m ping servers

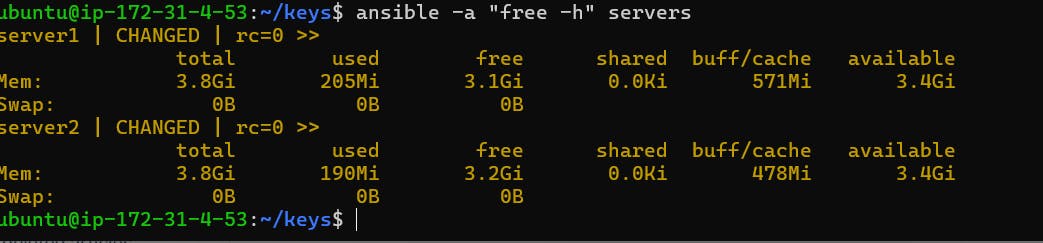
Now you can see your master server is connected to your server1 and server2 you can do any thing server1 and server2 using your master-server. now you need to check how may space is availble in your server1 and server2 so run the command in master-server .
ansible -a "free -h" servers